Analog to Digital Conversion (ADC)
Analog to Digital Conversion (ADC) is the process of converting a varying voltage (analog) to a sequence of discrete voltages (digital). MicroPython provides a convenient interface for this via ADC, which can be used on any pin whose number is prepended with an A on the ESP32 (pins 32 - 39). In this class we will typically use ADC with analog sensor input so it's okay to associate this process with (analog) inputs generally (for now).
To create and store an instance of ADC on the pin labeled A2: adc = ADC(Pin(34)).
Take a moment to wire up a potentiometer, or other voltage divider sensor, to pin 34 on the ESP32 and follow along:
For Example
- Connect to the ESP32:
screen /dev/tty.SLAB_USBtoUART 115200 - import
ADCandPinfrommachine:from machine import ADC, Pin - create an instance of an
ADCon pinA2(i.e. pin number34):adc = ADC(Pin(34)) - set the attenuation (numerical range) for this
ADCinstance:adc.atten(ADC.ATTN_11DB) - read the voltage at pin
34:adc.read() - repeat step 5.
- repeat step 5. again
- repeat step 5. one more time
- In step 4. we set the range of our
ADCinstance viaadc.atten()(short for attenuate). Hereadc.atten(ADC.ATTN_11DB)sets the input range to0.0Vto3.6V - In steps 6. - 8. we ran the same line of code three times and got three different values because the
voltageisanalog(varying). Someanalogsensors producevoltagesthat are more varied than others.
Digital to Analog Conversion (DAC) / Pulse Width Modulation (PWM)

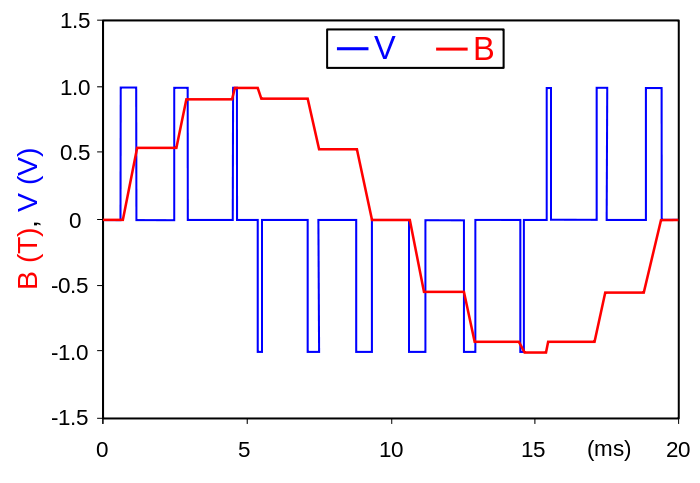
Digital to Analog Conversion (DAC) is the opposite of ADC: a DAC converts a sequence of discrete voltages into a varying voltage. In order to approximate an analog voltage with a digital pin on the ESP32 one typically uses Pulse Width Modulation (PWM). This is accomplished by toggling a digital pin on and off very quickly.
The image above is an example of PWM output. Note that it approximates an analog voltage but, if we look closely, we can still observe the discrete steps of the original digital signal.
Hookup Pattern

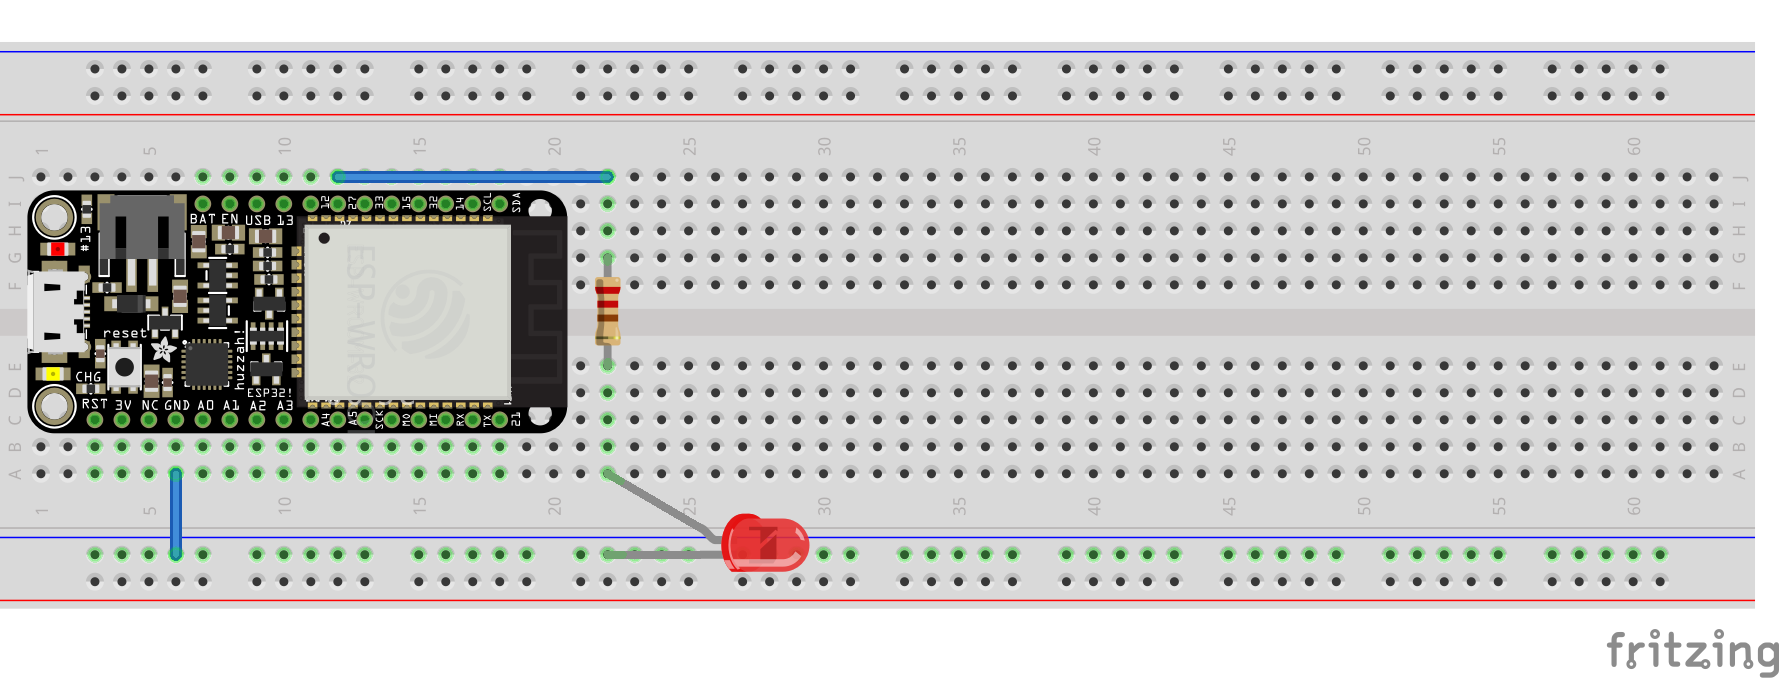
In the following sequence we instantiate a PWM instance and associate it with an ESP32 pin. Log in to your ESP32 via screen and follow along:
For Example
- import
PinandPWMfrommachine:from machine import Pin, PWM - store
PWMpin number to the variablepin:pin = Pin(27) - create a
PWMobject and store it atpwm27:pwm27 = PWM(pin)
There are two parameters associated with PWM: frequency and duty cycle:
- the
frequencycontrols the speed at which the pin is toggledONandOFF - the
duty cycleis how long the pin isHIGHcompared to the length of a single period (LOWplusHIGHtime). Maximumduty cycleis when the pin isHIGH(On) all of the time, minimum is when it isLOW(OFF) all of the time.
Follow along to experiment with changing these settings:
For Example
- set the
PWMfrequencyto1000:pwm27.freq(1000) - set the
PWMduty cycleto200:pwm27.duty(512)(i.e. 50% brightness) - change the
PWMduty cycleto0:pwm27.duty(0)(i.e. off) - change the
PWMduty cycleto1023:pwm27.duty(1023)(i.e. 100% brightness) - turn
PWMon the pin off:pwm27.deinit() - Ctl-D to reboot
Alternately, one could declare and set values for a PWM pin all at once, which would like something like this: pwm27 = PWM(Pin(27), freq=20000, duty=512)
Fading LEDs
Last week we discussed using for loops with Python's range() to count. Open Jupyter Notebook and run the following for a refresher:
For Example
for i in range(5):
  print(i)
One can use a for loop with a PWM pin to create the effect that an LED is fading in or fading out by incrementally changing the duty cycle, or by counting until one reaches the desired LED brightness. Follow along on your ESP32:
For Example
'''
fade_in.py
'''

from time import sleep
from machine import Pin, PWM

pwm = PWM(Pin(27), freq = 20000, duty = 0)

for i in range(1024):
    print(i)
    pwm.duty(i)
    sleep(0.01)

print("100%")

pwm.deinit()
So the counter, or iterator (i), is used to set pwm.duty(), resulting in an incrementally brighter LED.
For Example
'''
fade_out.py
'''

from time import sleep
from machine import Pin, PWM

pwm = PWM(Pin(27), freq = 20000, duty = 1023)

for i in range(1023, -1, -1):
    print(i)
    pwm.duty(i)
    sleep(0.01)

print("OFF!")

pwm.deinit()
The code above is virtually identical to fade_in.py, however here the for loop starts at 1023 (100% brightness) and counts down to 0 (Off), and stopping at -1, resulting in a incrementally dimmer LED.
Breathing LEDs
If one puts the for loop from fade_in.py and the for loop from fade_out.py into a while loop one can create a kind of breathing effect. Follow along on your ESP32:
For Example
'''
    breathe.py
'''

from time import sleep
from machine import Pin, PWM

pwm = PWM(Pin(27))
pwm.freq(60)

while True:
    for i in range(1024):
        if i == 0:
            print("inhale")
        pwm.duty(i)
        sleep(0.001)
    for i in range(1023, -1, -1):
        if i == 1023:
            print("exhale")
        pwm.duty(i)
        sleep(0.001)